Advertisement
The idea of teaching computers to "see" might sound like something reserved for robotics labs or sci-fi films, but it’s surprisingly doable—especially with OpenCV. Whether it’s detecting faces in a crowd, filtering colors, or sharpening blurry edges, image processing opens up endless possibilities. And no, you don’t need to be a computer vision expert to dip your toes in. If you know your way around Python and have a bit of curiosity, OpenCV has your back.
Let’s start with the basics and walk through what it takes to begin your image processing adventure using this versatile open-source tool.
OpenCV is an acronym for Open Source Computer Vision Library. Since 1999, OpenCV has become a renowned framework for real-time video and image processing. Being supported in numerous programming languages, such as Python, C++, and Java, OpenCV has become the preferred choice for most developers, researchers, and hobbyists.
So, how does it tick? First, it's filled with more than 2,500 tuned algorithms that enable you to accomplish anything from basic tasks such as reading and displaying an image to advanced tasks like tracking objects, gesture recognition, and edge detection. Second, it's very efficient. OpenCV is fast even on low-end hardware, which means it is perfect for actual applications.
Before you can do anything, you need to get OpenCV up and running. Thankfully, installing it on your system is about as easy as it gets. Here's how to do it step-by-step:

If you don’t already have Python installed, now’s the time. The latest version of Python 3 works well. It’s also a good idea to set up a virtual environment to avoid conflicts with other packages.
bash
CopyEdit
python -m venv opencv-env
source opencv-env/bin/activate # Use `opencv-env\Scripts\activate` on Windows
Once inside the virtual environment, use pip to install OpenCV.
bash
CopyEdit
pip install opencv-python
That gives you access to the core functionality. If you also want OpenCV’s extended modules like face recognition or machine learning tools, add the opencv-contrib-python package.
bash
CopyEdit
pip install opencv-contrib-python
Run a quick test in Python to confirm everything is good to go:
python
CopyEdit
import cv2
print(cv2.__version__)
If you see a version number, you’re all set.
Once OpenCV is installed, it's time to actually see it in action. Let’s start with loading and displaying an image—something you’ll do often.
python
CopyEdit
import cv2
image = cv2.imread('sample.jpg')
This line reads an image and stores it as a NumPy array. If the image isn't found, the image will be None.
in python
CopyEdit
cv2.imshow('My Image', image)
cv2.waitKey(0)
cv2.destroyAllWindows()
The waitKey(0) function keeps the window open until you press a key, while destroyAllWindows() closes it.
Want to store the modified image? No problem:
python
CopyEdit
cv2.imwrite('output.jpg', image)
Now that you've got the image into OpenCV, it’s time to start manipulating it. Here are a few common techniques that form the foundation for more advanced tasks.
Most processing starts with converting the image to grayscale:
python
CopyEdit
gray = cv2.cvtColor(image, cv2.COLOR_BGR2GRAY)
This makes edge detection and thresholding much more manageable.
To change the size:
python
CopyEdit
resized = cv2.resize(image, (300, 300))
This is especially useful when you’re working with large image files.
To smooth out noise:
python
CopyEdit
blurred = cv2.GaussianBlur(image, (5, 5), 0)
This can help clean up the image before edge detection or thresholding.
Want to detect outlines? Canny Edge Detection is a go-to:
python
CopyEdit
edges = cv2.Canny(image, 100, 200)
You’ll get a black and white image highlighting only the edges.
Image processing becomes a lot more interesting once you start applying transformations. These aren’t just for aesthetics; they help extract important features or prep an image for deeper analysis.

Thresholding creates binary images. Anything above a certain value turns white; the rest turns black.
python
CopyEdit
ret, thresh = cv2.threshold(gray, 127, 255, cv2.THRESH_BINARY)
This can be useful when detecting shapes or isolating text.
To rotate the image by 90 degrees:
python
CopyEdit
rotated = cv2.rotate(image, cv2.ROTATE_90_CLOCKWISE)
To flip it horizontally:
python
CopyEdit
flipped = cv2.flip(image, 1)
Want to add shapes? You can draw lines, circles, and text using simple functions.
python
CopyEdit
cv2.rectangle(image, (50, 50), (150, 150), (0, 255, 0), 2)
cv2.putText(image, 'Hello', (50, 45), cv2.FONT_HERSHEY_SIMPLEX, 1, (255, 0, 0), 2)
Useful for annotating images or debugging.
If you’ve followed along so far, you now know how to install OpenCV, read and write images, perform basic transformations, and even annotate them. That’s not just a start—that’s a strong foundation.
From here, you can try integrating OpenCV with other libraries like NumPy and Matplotlib for even more functionality. Or explore more complex areas like contour detection, face recognition, and live video processing.
OpenCV doesn’t just hand you tools—it gives you building blocks. With just a few lines of code, you can do things that used to take massive computing power. It’s about solving visual problems in a smart, efficient way.
Getting started with OpenCV doesn’t require much—just a few basic concepts and a willingness to try things out. What begins with loading and resizing images can easily grow into real-time video analysis or object detection. The key is not to rush. Play with the functions. Try different parameters. See how the image reacts. And before long, you’ll find yourself building applications that do more than just display pictures—they understand them.
Advertisement

IBM showcased its agentic AI at RSAC 2025, introducing a new approach to autonomous security operations. Learn how this technology enables faster response and smarter defense
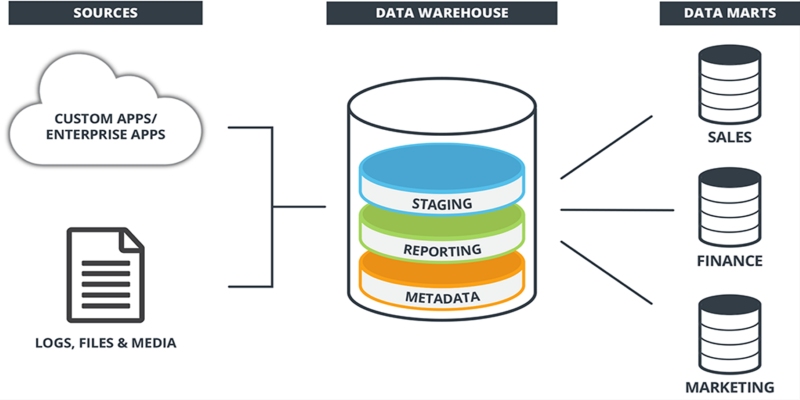
Learn what a data warehouse is, its key components like ETL and schema designs, and how it helps businesses organize large volumes of data for fast, reliable analysis and decision-making

Know how AI transforms Cybersecurity with fast threat detection, reduced errors, and the risks of high costs and overdependence

Struggling to connect tables in SQL queries? Learn how the ON clause works with JOINs to accurately match and relate your data

How IonQ advances AI capabilities with quantum-enhanced applications, combining stable trapped-ion technology and machine learning to solve complex real-world problems efficiently

What's changing inside your car? A new AI platform is making in-car assistants smarter, faster, and more human-like—here's how it works
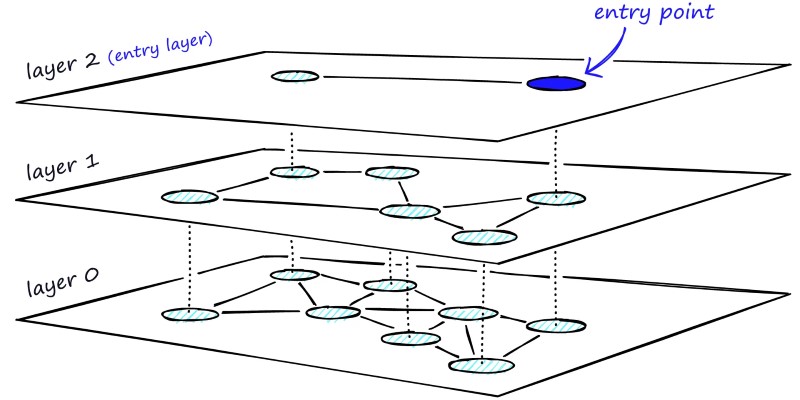
Learn how HNSW enables fast and accurate approximate nearest neighbor search using a layered graph structure. Ideal for recommendation systems, vector search, and high-dimensional datasets

Discover a clear SQL and PL/SQL comparison to understand how these two database languages differ and complement each other. Learn when to use each effectively
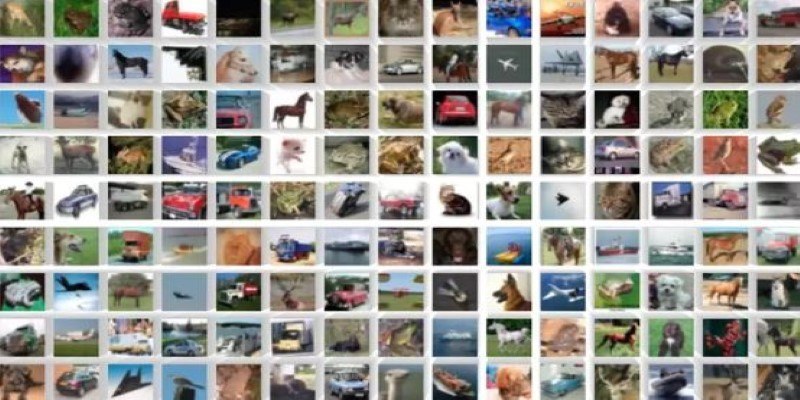
How to classify images from the CIFAR-10 dataset using a CNN. This clear guide explains the process, from building and training the model to improving and deploying it effectively

An AI health care company is transforming diagnostics by applying generative AI in radiology, achieving a $525M valuation while improving accuracy and supporting clinicians

Sam Altman returns as OpenAI CEO amid calls for ethical reforms, stronger governance, restored trust in leadership, and more

AI-first devices are reshaping how people interact with technology, moving beyond screens and apps to natural, intelligent experiences. Discover how these innovations could one day rival the iPhone by blending convenience, emotion, and AI-driven understanding into everyday life